
Patches on clothing have evolved from simple mends to a fashionable, expressive way to personalize garments, letting you tell your story through fabric and color. This guide introduces patch application techniques, guiding you from fabric prep to placement and heat-activated options for a smooth, lasting finish. You’ll learn how to sew patches with durable stitching and careful alignment, ensuring clean edges, balanced tension, and lasting wear. In addition, you’ll discover strategies for reinforcing fabric and extending the life of garments, whether on denim, knits, or canvas. With practical steps, clear visuals, and real-world tips, you’ll gain confidence applying patches that stay durable and look intentional.
Beyond mending, the concept expands into garment patches, fabric appliqués, and decorative embellishments that tell a story on any piece of clothing. In SEO terms, using related terms such as fabric appliqués, decorative badges, and mended accents helps search engines associate the topic with visual customization. This section explores how these synonyms apply across different fabrics and styles, from denim and canvas to knits and leather, to broaden relevance. Whether you frame them as embroidered accents, fabric emblems, or decorative repairs, the practical steps—planning, prep, and secure application—remain straightforward.
Patches on Clothing: Basics, Tools, and Placement Strategies
Patches on clothing transform fabric from a simple repair into a personal statement. To achieve professional results, learn the basics of patch types and the core patch application techniques that govern success. Whether you choose iron-on patches for speed or sew-on patches for lasting durability, the right setup makes the project easier and the finish cleaner.
Plan placement before you start: test positions with pins, chalk marks, or removable tape, and consider symmetry on jackets, sleeves, or elbows. When you move to sewing patches, you’ll master how to sew patches with clean edge finishes that resist wear, while iron-on patches call for careful fabric compatibility and adherence to the patch instructions for heat.
Iron-On Patches Demystified: Fast and Durable Applications
Iron-on patches offer a quick path to a polished look. Choose patches with a reliable heat-activated backing, prepare the garment with a clean, flat surface, and use a pressing cloth to protect fibers during application. With the right temperature and steady pressure, iron-on patches bond securely and are ideal for lightweight or non-heat-sensitive fabrics.
To boost longevity, consider reinforcing the edges with a light stitching line after bonding. This hybrid approach—heat adhesion plus careful stitching—is a practical example of patch application techniques that balance speed with durability.
Sew-On Patches for Long-Lasting Durability
Sew-on patches rely on stitched edges rather than heat. Learn how to sew patches by choosing a stitch that suits the fabric—running stitch, zigzag, or a dense satin stitch—and plan an even seam. Hand sewing offers control, while a sewing machine speeds up the process for larger patches.
For fabrics that don’t tolerate heat—knits, synthetics, or delicate weaves—sew-on patches are often the more reliable choice. You’ll also benefit from a secure finish with backstitching and an optional topstitch along the patch edge to prevent unraveling.
Patch Application Techniques: A Step-by-Step Guide to Flawless Results
Patch Application Techniques: Step-by-Step Guide to Flawless Results. This overview applies to both iron-on and sew-on patches, starting with fabric prep, placement testing, and checking patch compatibility with the garment.
Then lock in the design with the appropriate method: heat and pressure for iron-ons or secure stitching for sew-ons. By combining precise alignment, proper tools, and time for adhesives to set, you’ll minimize wrinkles and achieve a durable, professional finish.
Patch Repair Clothing: Repairing Holes with Style
When a hole appears, patch repair clothing can be the strongest option. A sturdy patch behind the wear area stops further tearing, while a decorative patch on the outside adds personality.
Use patches with stable backing, and consider fusible interfacing on delicate fabrics to prevent sagging. This approach blends function with design, turning an ordinary repair into a distinctive garment.
Care and Maintenance: Keeping Patches Looking Fresh on Every Garment
Care for patched garments means selecting washing and drying settings that preserve both fabric and patch integrity. Turn garments inside-out, use cold water when possible, and opt for gentle cycles to reduce edge lift and color fading.
Over time, you may need to reapply heat or re-stitch edges that loosen. Regular inspection helps catch loose corners before detachment, and following care guidelines for iron-on patches and sew-on patches keeps patches on clothing looking sharp.
Frequently Asked Questions
What are the best patch application techniques for patches on clothing?
Patch application techniques for patches on clothing typically involve choosing between iron-on patches and sew-on patches, preparing the fabric, and using heat or stitching. For iron-on patches, apply heat with a clean, dry iron over a pressing cloth for the recommended time, then test adhesion and reinforce with stitching if desired. For sew-on patches, pin in place and stitch around the edges with a tight, even stitch or a satin/backstitch for durability. Always follow patch instructions and let the garment cool before handling.
How do iron-on patches compare to sew-on patches for patches on clothing?
Iron-on patches offer quick, beginner-friendly results and work best on fabrics that tolerate heat; they can be finished with minimal sewing. Sew-on patches provide greater durability and work on a wider range of fabrics, especially knits or delicate materials. For long-lasting patches on clothing, consider reinforcing with light topstitching after attaching the patch.
How to sew patches on clothing: step-by-step guide?
To sew patches on clothing, position the patch and pin it in place. Choose a stitch (running, zigzag, or satin) and sew around the edge, using a backstitch for strong, secure hand sewing or a matching sewing machine stitch for speed. Finish with secure knots or backstitching and trim excess thread. This is a practical approach to how to sew patches.
What is patch repair clothing and when should I use patches on clothing for repairs?
Patch repair clothing involves applying a patch to mend holes or frays, either from the outside or with a backing patch underneath. For repairs, clean and stabilize the area, place the patch, and sew around the edge or use iron-on methods if appropriate, then reinforce as needed. This method extends the garment’s life while keeping a neat appearance.
Where should you place patches on clothing for a balanced look?
Patch placement matters for patches on clothing. Try denim jackets or pockets for a classic look, shoulders or sleeves for visible style without bulk, elbows for a retro vibe, or back yoke for a bold statement. Test placement with pins or chalk marks before attaching to ensure symmetry and alignment.
How to care for patches on clothing to maximize durability?
Care tips for patches on clothing include washing inside out on a gentle cycle with cold water, and air-drying when possible. If you use iron-on patches, avoid high heat that can degrade the adhesive, and re-adhere as needed following the original guidelines. Store patched garments away from direct sunlight to prevent fading and wear.
| Aspect | Summary | Notes / Tips |
|---|---|---|
| Introduction / Purpose | Patches on clothing offer repair, decoration, and extended garment life; they enable personal expression on garments like denim, jackets, or stained items. | Focus on patch types (iron-on and sew-on) and how to apply them. |
| Patch Types | Iron-on patches use a heat-activated adhesive; sew-on patches require stitching. Iron-ons are quick and beginner-friendly; sew-ons are typically more durable, especially on heat-sensitive fabrics. | Consider fabric compatibility and durability needs when choosing between patch types. |
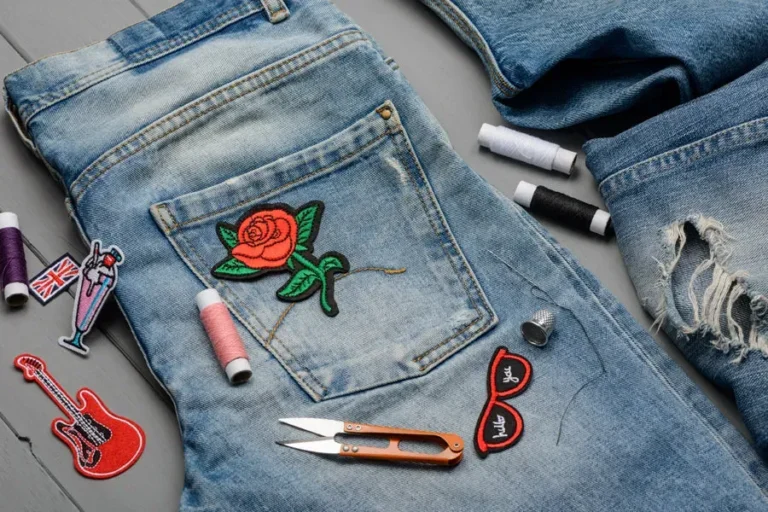
| Tools & Materials | Essential items include patches (iron-on or sew-on), clean ironing surface, pressing cloth, iron/heat source, pins, scissors, chalk/fabric marker, and thread/needles or a sewing machine. Optional: fabric glue, interfacing for delicate fabrics. | Keep a measuring tool and markers handy for precise placement and alignment. |
| Placement | Plan placement on flat garments; common spots include denim jackets, shoulders, elbows, back yoke, and chest areas. Arrange patches in a grid or scattered pattern and test alignment with pins or tape. | Symmetry and spacing matter; for sew-on patches, pin before stitching; for iron-ons, temporary repositioning methods help test alignment. |
| Iron-On Process | Prep fabric, position patch, set iron to appropriate heat, protect patch with a pressing cloth, apply heat/pressure as instructed (typically 15–30 seconds), test adhesion, cool, and optionally reinforce by stitching edges. | Follow patch instructions precisely; avoid steam unless specified. |
| Sew-On Process | Prepare fabric and patch, align with pins, choose stitch (running, zigzag, or satin; backstitch for hand sewing), sew around edges with small, even stitches, finish securely, and optionally add a topstitch for durability. | Backstitch at the end for durability; use matching thread for a neater finish. |
| Fabric Considerations | Denim/canvas tolerate patches well; cotton/linen may need lighter interfacing and smaller stitches; knits require sew-on with stretch considerations; dark fabrics benefit from matching thread and edge stitching. | Choose patch type and stitching method based on fabric tolerance and wear patterns. |
| Care & Maintenance | Wash inside-out on gentle cold cycles; air-dry when possible; heat can weaken iron-on adhesives; reapply heat if re-adhering; store patched garments away from direct sunlight. | Mild detergent and careful drying extend patch life. |
| Patch Repair vs. Patch Addition | Patches can repair holes or reinforce frayed edges; may require backing material beneath the patch for stability; ensure underlying fabric is clean and stable before application. | A backing patch on the inside can prevent further tearing in repairs. |
| Creative Ideas | Patches enable personal style: themed collections (travel, bands, embroidery-inspired designs) and mixing iron-on with sew-on patches for durability in high-stress areas. | Limit color palette or use symmetry to create cohesive looks; story-telling through patches enhances visual appeal. |
| Common Mistakes & Fixes | Peeling, bunching, frayed edges, and misalignment are common; fixes include proper heat/pressure, choosing sew-on where heat is unreliable, testing placement, and secure stitching. | Reposition patches before final adhesion; use tight stitches or satin edges around the patch to seal seams. |
Summary
Patches on clothing open a world of creative expression and practical repair. This guide covers iron-on patches and sew-on patches, patch application techniques, how to sew patches, and patch repair clothing, guiding you from fabric prep to care. With the right tools, placement, and maintenance, patches become a durable, stylish element of everyday wear. Whether you’re patching a beloved denim jacket or adding a playful touch to a simple tee, you can achieve professional-looking results that endure daily wear.