
Budget-friendly Custom Roll-up Banner Design makes a polished, high-impact display possible without breaking the bank for your next event. For events, trade shows, or on-site promotions, this approach emphasizes readability, brand consistency, and a clear call to action that guides attendees. By pairing cost-conscious choices with clean typography and restrained visuals, you can achieve budget-friendly roll-up banner ideas while preserving impact. This practical framework highlights affordable materials, standard sizes, and print-ready practices that keep the project within scope without sacrificing quality. With tested steps and reliable tips, your banner will attract attention, strengthen recognition, and support your marketing goals at various venues.
Thinking about it in broader terms, the topic becomes cost-efficient signage and effective event branding that still captures attention. Practically, this means crisp headlines, legible type at a distance, and materials that balance appearance with price. This approach maps to the principles of affordable design for banners, durable yet economical substrates, and scalable layouts that adapt to different venues. The overarching aim is to deliver clear messaging quickly, so audiences understand your value without friction.
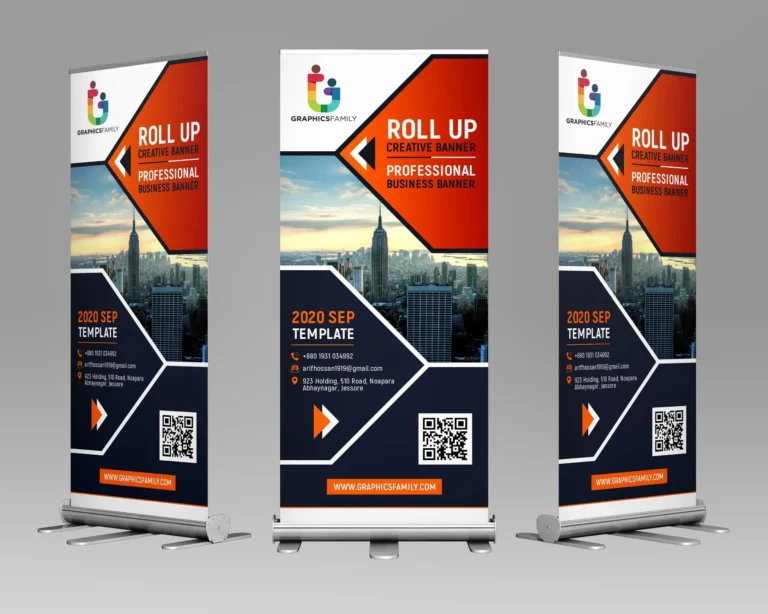
Budget-friendly Custom Roll-up Banner Design: Principles and Practices
Designing a banner that looks premium doesn’t require a large budget. Budget-friendly Custom Roll-up Banner Design means focusing on the essentials: a strong headline, a single supporting point, your logo, and a clear call to action. By starting with a tight brief and a realistic budget, you can maximize impact per dollar while preserving brand integrity.
Throughout this guide, you’ll discover practical steps to achieve a professional result without overspending. When you embrace the idea of custom roll-up banner design on a budget, you prune clutter, prioritize readability, and optimize assets for print, ensuring you get a banner that looks as polished as more expensive options.
Choosing the Right Size and Material on a Budget
Choosing the right size and material on a budget starts with viewing distance and venue constraints. Standard heights like 33 x 80 inches (or 85 cm x 200 cm) offer strong visibility without pushing costs, especially when paired with economical substrates. A measured approach prevents paying for unused space at the show.
Material choice dramatically affects price and performance. Vinyl remains a cost-effective option with good durability for both indoor and occasional outdoor use, while fabric can add a premium feel but at higher cost. For many events, a satin or matte laminate on vinyl reduces glare and protects graphics without inflating the budget, satisfying budget-friendly roll-up banner ideas for practical outcomes.
Typography and Color Strategy for Clear Messaging
Typography and color are the loudest signals on a banner. Use two complementary typefaces—one for the headline and one for body text—to create a crisp information hierarchy that reads well from a distance. High contrast between text and background is essential to achieve legibility from 1.5–2.5 meters away, reinforcing the budget-friendly approach to design principles.
Keep color practical: leverage brand colors to ensure recognition while avoiding a crowded palette that increases printing costs. For those asking how to design roll-up banners cheaply, hierarchy, safe zones, and consistent typography are more important than decorative details. In practice, prioritize readability and brand consistency with the goal of affordable banner design tips in mind.
Copy That Converts Without Breaking the Bank
Copy that converts avoids fluff and tells the audience what they gain in seconds. Start with a bold headline, followed by a short supporting line, then a simple CTA, such as a URL or QR code. By focusing on the core value proposition, you align your message with what attendees care about during quick scans at events.
Incorporate related keywords naturally to enhance topical relevance, including phrases like custom roll-up banner design on a budget and budget-friendly roll-up banner ideas. Craft concise lines that invite action—visitors should understand the next step at a glance, not after reading a paragraph. This is where affordable banner design tips translate into practical copy choices.
Budget-Smart Workflows and Design Tools
Budget-smart workflows start with using accessible tools and templates. Free or affordable design platforms like Canva or low-cost vector assets let you build a master layout that you can reuse across campaigns, reducing design time and cost while keeping brand consistency. Build a repeatable process that scales with your needs and budget.
Organize your assets to maximize efficiency: reuse imagery, fonts, and color palettes while maintaining legibility and coherence. By adopting a budget-aware workflow, you can produce more banners with less effort, turning ideas into print-ready art quickly and affordably. This aligns with affordable banner design tips, enabling sustainable design practice.
Print-Ready Files and Vendor Communication: A Print-ready Roll-up Banner Guide
Print-ready files are the bridge between design and production. Aim for 300 dpi at final size and export in CMYK color mode to ensure color accuracy in most printers. Saving time with a PDF/X-1a or high-resolution PDF, with fonts embedded or outlined, helps avoid costly revisions.
Clear vendor communication is essential to prevent misinterpretation and delays. Provide proofed files, include necessary vector logos, and confirm bleed and safe margins to avoid cutoffs. Following the print-ready roll-up banner guide ensures your files deliver predictable results and that your budget stays on track, especially when negotiating with printers or requesting expedited options.
Frequently Asked Questions
What are the core principles of Budget-friendly Custom Roll-up Banner Design for a 33 by 80 inches banner?
Key principles for Budget-friendly Custom Roll-up Banner Design include: start with a clear brief; choose a standard size such as 33 by 80 inches to control costs; select economical vinyl with matte laminate for durability and affordability; use only two readable fonts with high contrast; keep the layout clean with essential elements (headline, main benefit, logo, call to action); ensure print ready files with 300 dpi at final size, CMYK color, 0.125 inch bleed and 0.5 inch safe margins; provide a vector logo and high resolution images. This approach aligns with the print-ready roll-up banner guide and demonstrates how to execute a budget-friendly custom roll-up banner design.
How can I apply Budget-friendly Custom Roll-up Banner Design to generate budget-friendly roll-up banner ideas that stay readable?
To generate readable budget-friendly roll-up banner ideas, focus on clarity and minimal copy: use a strong headline, a brief subline, and a single call to action; choose two complementary fonts with high contrast; ensure large type for viewing distance and maintain white space; avoid clutter and reuse templates to stay on budget; naturally weave keywords into the copy as part of the message, following affordable banner design tips.
In Budget-friendly Custom Roll-up Banner Design, what are cost-effective material choices and how do they impact appearance?
Cost-effective material choices include vinyl as the typical lower-cost option with good durability for indoor or short term outdoor use, while fabric can look premium but costs more; matte laminate reduces glare and protects graphics without adding much cost; be mindful that larger banners are not always better for every venue, as viewing distance matters; these decisions shape both the look and the total spend, illustrating how to design roll-up banners cheaply.
What print specifications are essential in Budget-friendly Custom Roll-up Banner Design to ensure print-ready results?
Essential print specifications include preparing files at 300 dpi at final size, using CMYK color mode, exporting as PDF X-1a or a high resolution PDF, embedding or outlining all fonts, and setting a 0.125 inch bleed with a 0.5 inch safe margin. Provide a single vector logo and any raster images at high resolution to prevent pixelation. Following these steps aligns with the print-ready roll-up banner guide.
What is the recommended workflow for Budget-friendly Custom Roll-up Banner Design to produce budget-friendly roll-up banner ideas and files?
Recommended workflow: begin with a brief listing essential elements (logo, headline, benefit, CTA, URL or QR); create a master two font layout and a reusable template; select cost-effective materials and standard dimensions; prepare print-ready files with CMYK, bleed, and embedded fonts or outlines; review proofs and confirm before printing; this approach captures budget-friendly roll-up banner ideas and keeps production efficient.
How can I measure ROI and avoid common mistakes in Budget-friendly Custom Roll-up Banner Design using affordable banner design tips?
To maximize ROI and avoid common mistakes, define clear objectives and KPIs, craft a strong CTA, ensure branding consistency across colors and typography, and avoid overcrowding; verify print specs and obtain proofs from the printer; track responses via URL or QR code to measure impact; apply affordable banner design tips to stay on budget while maintaining effectiveness.
| Section | Key Points | Notes / Examples |
|---|---|---|
| Introduction |
|
Set expectations for the guide and outline the core goal: affordable, effective roll-up banners that look premium without overspending. |
| 1) Set Clear Goals and Constraints |
|
Keep the goals measurable and decide where the banner will be used most (events, trades, storefronts). |
| 2) Material and Size Choices that Help Your Budget |
|
Consider venue constraints and balance cost with visibility and durability. |
| 3) Typography, Color, and Layout that Maximize Impact |
|
Apply consistent typography rules to maximize impact and legibility. |
| 4) Copy that Converts Without Breaking the Bank |
|
Craft concise, compelling copy with a clear CTA and relevant keywords. |
| 5) Design Tools and Budget-Smart Workflows |
|
Create scalable workflows to save time and money on future banners. |
| 6) Print-Ready Files and Vendor Communication |
|
Prepare files that printers can act on immediately to avoid delays. |
| 7) Cost Breakdown and Realistic Estimation |
|
Itemize costs to anticipate total spend and identify savings opportunities. |
| 8) Real-World Scenarios and Case Study |
|
Illustrates cost-saving tactics while preserving impact. |
| 9) Common Mistakes and How to Avoid Them |
|
Prevent common design pitfalls with clear guidelines. |
| 10) Final Checklist for a Successful Budget-friendly Roll-up Banner |
|
A practical, ready-to-execute list to ensure success. |
Summary
Budget-friendly Custom Roll-up Banner Design proves that a polished, high-impact banner can be achieved without breaking the bank. By focusing on essential content, strong typography, a clean layout, and print-ready files, you can create a banner that grabs attention, reinforces your brand, and fits your cost parameters. The principles of planning, material selection, typography, and a simple, persuasive message guide every stage—from brief to final proofs—ensuring consistent quality across events and marketing collateral. Revisit related keywords such as affordable banner design tips and print-ready roll-up banner guide to keep refining your process for future banners.