
Custom patches are a versatile way to showcase identity and style. In terms of custom patches design, brands balance storytelling with manufacturability and cost. Understanding the patch production process helps you align artwork, backing, and finishes with budget and lead times. When evaluating embroidered patches vs woven patches, you weigh texture, legibility, and durability across fabrics. PVC patches manufacturing offers a bold, durable option for graphic-heavy logos while complementing traditional patch lines.
In the next phase, the topic broadens into branding elements, using terms such as badges, emblems, or logo patches to convey identity. This semantic approach mirrors how search engines relate related terms, drawing on phrases like fabric badges, stitched identifiers, or label-like insignias to improve discovery. Describing the same product through diverse phrases helps content remain accessible while avoiding repetitive wording. Keep in mind the production workflow, finishing touches, backing options, and application methods, all of which contribute to a cohesive patch strategy. LSI-friendly references to embroidery, weaving, heat press, and durable materials align information with user intent and real-world use cases. Ultimately, imagine taking a brand concept from sketch to a finished patch that can be applied to jackets, bags, and uniforms.
Custom Patches Design Foundations: From Artwork to Vector Files
Design starts with clarity. For effective custom patches design, begin with clean artwork and scalable vector files so your patch can resize without losing detail. Clear artwork supports predictable stitching, color management, and easier proofing with your manufacturer. By mapping out color palettes, typography, and border treatments early, you set a solid foundation that aligns with your brand while reducing back-and-forth during the patch production process.
In this phase you’ll consider stitch counts, border treatments, and backing options to ensure the final patch looks as good on a jacket as it does on a hat. Planning ahead for proofs helps you validate how colors and textures translate from screen to fabric. This early design discipline, part of the custom patches design process, makes later decisions about embroidery versus weaving or PVC mechanics smoother and more cost-efficient.
Patch Types and Materials: Embroidered Patches vs Woven Patches, plus PVC Patches Manufacturing
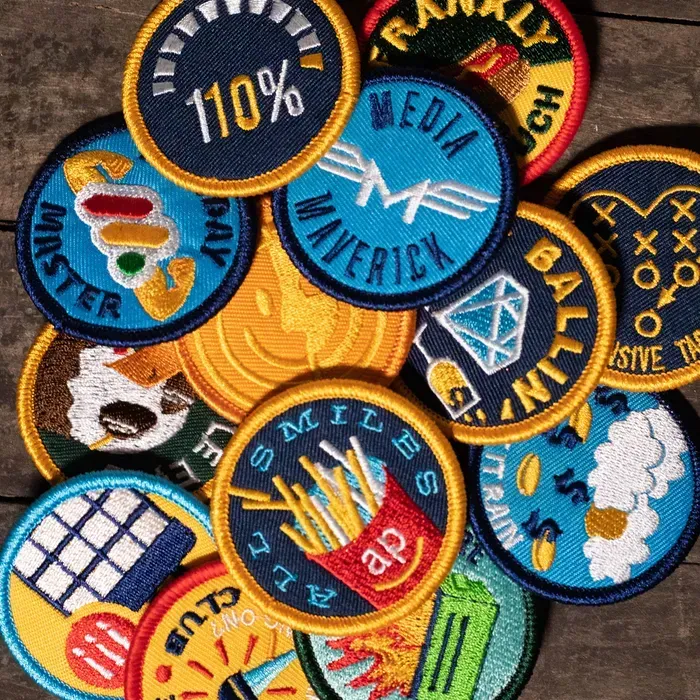
There are three main patch types today, each with distinct visual and tactile characteristics. Embroidered patches offer rich texture and strong durability, especially on denim and canvas, making them ideal for bold, high-contrast designs. This aligns with the traditional strengths of embroidered patches and their recognition in branding.
Woven patches excel at fine detail and small text, providing a smoother appearance at smaller sizes. They can be advantageous where legibility is critical, though wear over time may differ from embroidery. PVC patches manufacturing represents a modern, flexible alternative—durable, weather-resistant, and capable of bold, graphic designs that stand up to frequent washing.
Backing and Finishes: How They Shape the Patch Production Process
Backing choices—iron on, sew on, or peel and stick—directly influence ease of use, durability, and wash resilience. The backing you choose affects how the patch adheres to fabric and how it will perform in real-world wear. Finishes such as merrow borders add a crisp, professional edge that can enhance color retention and edge durability, an important consideration in the patch production process.
Backings also determine maintenance needs and user application. Iron-on backs provide quick convenience, while sew-on backs favor long-term wear on heavy-use gear. When you’re planning the design, factor in backing compatibility to ensure your custom patches design remains consistent through production and across various garments.
From Artwork to Cut-and-Stitch: The Patch Production Process
The patch production process begins with artwork review and digitization, where your logo is translated into stitch instructions. Digitization determines stitch types, density, underlay, and thread colors, all of which influence texture, legibility, and durability. A high-quality digitization is essential for clean results, especially for intricate designs.
Following digitization, material selection, backing choice, cutting, stitching, and finishing complete the workflow. Vendors may specify file formats, color matching, stitch count limits, and minimum order quantities. Understanding these milestones helps you forecast timelines, manage client expectations, and avoid surprises in the patch production process.
Sizing, Shape, and Color Management for Maximum Impact
Patch size and shape influence embroidery or weaving density and overall cost. Round patches suit circular logos while shield shapes work well for team branding. Effective color management is crucial; specify Pantone colors where possible and request a color proof to ensure alignment with your brand.
If your design includes gradients or fine details, discuss how these will render in embroidery or weaving to avoid blurry edges or color bleed. The ability to customize sizes and shapes is a key benefit of patches for branding, but it requires thoughtful planning during the patch design phase to ensure your patch looks right at every scale.
Application Techniques and Care for Longevity
Applying patches correctly maximizes lifespan and visual appeal. Patch application techniques vary by backing type: iron-on patches require heat and pressure with a compatible iron or heat press, while sew-on patches are preferred for heavy-use gear due to their durability. PVC patches may feature a self-adhesive backing or can be sewn, depending on design and use.
Care and maintenance further extend patch life. For all patches, follow washing instructions—turn garments inside out and avoid high heat cycles where possible. Regular inspection for loose threads or edge wear helps maintain a crisp appearance. Clear patch care guidelines support user confidence and protect your branding over time.
Frequently Asked Questions
What is the patch production process for custom patches?
The patch production process typically includes artwork review and digitization, material and backing selection, cutting, stitching, finishing, and quality control. Expect proofs, color matching, stitch-count limits, and minimum order quantities (MOQs). Lead times vary by complexity and quantity.
When should you choose embroidered patches vs woven patches for your logo?
Embroidered patches offer rich texture and durability, ideal for bold designs on denim and canvas; woven patches capture fine detail and small text but may wear differently over time. Consider size, legibility, and color management to choose the best option for your brand.
How can you optimize custom patches design to balance aesthetics and production feasibility?
Start with clean vector artwork, plan stitch counts, underlay, and color management; choose patch size/shape, merrow borders, and backing; request proofs from the manufacturer early to ensure feasibility and brand alignment.
How does PVC patches manufacturing differ from traditional embroidery and weaving, and when should you choose PVC patches?
PVC patches manufacturing yields flexible, durable patches with bold graphics; they’re weather resistant and easy to wash, making them ideal for frequent wear and outdoor use, where embroidery or weaving might not hold up as well.
What are the best patch application techniques and backing options to ensure long wear?
Backing options include iron-on, sew-on, and peel-and-stick; patch application techniques depend on backing. Iron-on is quick for light use, sew-on provides long-term durability for heavy wear, and care instructions help maximize lifespan.
What cost and timeline factors affect the patch production process and MOQs?
Costs are driven by MOQs, tooling/setup fees, color matching, and finish options; lead times depend on complexity and order size; always request a sample or digital proof to verify before mass production and compare quotes across vendors.
| Topic | Key Points |
|---|---|
| Introduction | Custom patches are versatile; used on apparel, bags, hats, and gear; this guide covers design, production, and application with a focus on real world decisions. |
| Design considerations | Balance aesthetics, legibility, and feasibility. Start with clear vector artwork. Consider stitch counts, complexity, and color management. For woven patches you may have more flexibility with fine lines but color blending can be challenging. The size and shape of the patch influence both the visual impact and the cost of production. When thinking about backing options such as iron on, sew on, or peel and stick, consider how the patch will be applied and by whom. Plan ahead and request proofs from your manufacturer. In the patch design phase you map out color palettes, typography, and border treatments to ensure the final patch aligns with your brand. |
| Patch types and materials | There are three main patch types today: embroidered patches, woven patches, and PVC patches. Embroidered patches are the classic choice with rich texture and durability. They shine on denim and canvas and work well for bold high contrast designs. Woven patches are great for fine detail and small text; they can look smoother than embroidery at small sizes, but color blending can be challenging. PVC patches are modern, flexible, and highly durable; they stand up to frequent washing and weather exposure and are ideal for bold graphic designs. |
| Context on the patch production process | From concept to finished product the patch production process involves several steps: artwork review and digitization, selecting backing and backings, material selection, cutting, stitching, and finishing. This workflow is typical for patch projects and applies whether you are producing embroidered patches or other types. Vendors often provide files in a specific format and may require color matching, stitch count limits, and minimum order quantities. In this section I outline typical milestones in the patch production process so you know what to expect. |
| Artwork and digitization | The first stage is turning your logo or artwork into patch ready format. For embroidery digitizing converts artwork into stitch instructions. The digitization process determines stitch types, density, underlay, and thread colors. The better the digitization the cleaner the final patch, especially for intricate designs. |
| Material selection and backing | Next comes material selection. The patches can be sewn on, iron on, or heat seal backed. The backing choice affects ease of use and durability. Iron on backing is popular for quick application but professional use cases may prefer sew on backing for long term wear. Some patches also feature a fabric backing for structure. Backing adhesives and finishes also matter. Some patches use merrow edges for a clean border and a finished look. The choice of backing can affect washing resilience and colorfastness. |
| Production steps and quality control | After digitization the patch production goes into cutting, stitching, finishing, and quality control checks. These checks verify alignment, color accuracy, and stitching integrity. Depending on the complexity and the patch type you may have production lead times in days or weeks, with variations for large runs or rush orders. |
| Understanding limitations and costs | Minimum order quantities, tooling and setup fees can influence overall price. Plan early by requesting quotes from multiple vendors and comparing unit costs as well as lead times and guarantees. Request a sample first to ensure the patch looks and feels right before committing to a large run. If you are negotiating, discuss options like split shipments or digital proofs to reduce risk before mass production. |
| Application techniques and care | Applying patches correctly helps maximize lifespan and visual appeal. For embroidered or woven patches iron on backing requires heat and pressure with a compatible iron or heat press. Sew on patches are preferred for heavy use gear because they resist peeling under stress. PVC patches may have a self adhesive backing option or can be sewn depending on the design and intended use. Clear instructions for patch application help end users. When washing clothes with patches turn garments inside out and avoid high heat cycles to preserve color and texture. Patch application techniques vary by backing type. |
| Care and maintenance | Patches should be treated with care. PVC patches are typically the easiest to clean with a damp cloth. Embroidered patches may benefit from turning garments inside out before washing. Colorfastness depends on thread choices and backing materials, so verify colorfastness with your supplier. Consider finishes like merrow borders and edge stitching to enhance durability. Regular inspection of patches for loose threads or border wear can extend patch life and maintain a crisp appearance. |
| Sizing, shape, and color | Patch size and shape influence print or embroidery density and overall cost. Round patches may suit logos with circular symmetry, while shield shapes work well for team branding. Color management is critical; specify Pantone colors when possible and request a color proof. If your design includes gradients or fine details discuss how these will render in embroidery or weaving. The ability to customize sizes and shapes is one of the key benefits of using patches for branding. |
| Case studies and practical tips | Look at real world examples to understand what makes patches effective. A band might use embroidered patches on jackets for a classic look and to maintain long wear. A streetwear brand could opt for PVC patches to achieve bold graphics with simple production lines and lower minimums. For clubs or organizations woven patches can provide a refined appearance with clear text and legible logos. These cases illustrate how patch design, patch production, and patch application work together to produce strong branding. |
| Sourcing and supplier considerations | When you are sourcing custom patches evaluate potential suppliers on design capabilities patch production process expertise quality control and turnaround times. Request portfolios and samples to assess color accuracy alignment and texture. Discuss minimums pricing shipping and whether the factory can support both small batches and large runs. If you plan limited editions discuss whether the manufacturer can handle small runs while preserving consistent quality. Ask about warranties and revision policies so you know what to expect in case of a mismatch or error. |
| Conclusion | Custom patches provide a flexible scalable way to brand apparel and gear. By understanding patch design patch production process and patch application techniques you can create patches that look great wear well and stay within budget. Whether you choose embroidered patches woven patches or PVC patches manufacturing a thoughtful approach to design and production will help you deliver patches that resonate with your audience and stand up to daily wear. |
Summary
custom patches are a versatile branding tool that can elevate uniforms, merchandise, and event gear, connecting your identity across apparel, bags, hats, and more. In this descriptive overview we explore how patch design decisions backing options production methods and application techniques come together to create patches that look great wear well and stay within budget. By choosing between embroidered woven and PVC patches and by planning proofs color management and care you can deliver high quality patches that reinforce your brand. Attention to sourcing testing and clear care instructions helps maintain colorfastness and longevity ensuring your patches withstand daily wear and washing.