
Custom roll up banner for trade shows is more than a backdrop—it’s a portable, eye-catching gateway to your value proposition and an immediate signal of professionalism, helping your team stand out in a sea of booths while aligning with your broader marketing strategy. In a crowded hall, the banner must communicate your core message within seconds, guiding attendees from awareness to curiosity without overwhelming them, and it should be designed to read clearly from multiple angles as crowds drift past. Beyond bold visuals, it should align with your brand, leverage concise typography, and anticipate the questions your team will answer on the show floor, while balancing the hierarchy between headlines, supporting details, and a clear call to action. This introductory paragraph also weaves in practical considerations, from layout, color choices, and typography hierarchy to printing specs, bleed margins, and durability concerns, so you can translate concept into booth-ready execution that withstands long exhibition days. By embracing roll up banner design tips, exploring trade show banner ideas, and integrating designing roll up banners with banner printing for trade shows alongside your other collateral, you’ll craft a banner that supports conversations and reinforces your brand promise.
In other words, the same message can be conveyed through a portable exhibit banner, a pull-up display, or a signage panel that anchors your booth. Following Latent Semantic Indexing principles, pair the core concept with related terms such as exhibit graphics, booth signage, display panels, and event-ready branding to help search engines link your page with a broader set of relevant topics. Think of the banner as part of a cohesive suite—coordinated visuals, consistent fonts, and copy designed for quick scanning that supports a compelling value proposition. By weaving these alternative terms into your copy, you improve discoverability for audiences researching banner design, printing for events, and trade show optimization. Together, the two-phrase strategy creates a friendly, informative introduction that invites readers to learn more about how to design, print, and deploy impactful marketing signage at live events.
Clarifying Your Core Message for a Roll Up Banner
A roll up banner succeeds first and foremost when the core message can be read and understood in seconds. Start by crafting a one-liner that communicates your unique value proposition in 8–12 words, ensuring it can be scanned at a distance and across busy aisles. This concise statement becomes the banner’s backbone, guiding all supporting text and visuals so attendees grasp your offer instantly.
Pair the core message with a focal image or graphic that reinforces the value you provide. When selecting imagery, ensure you either own the rights or have licensed use for commercial purposes. This aligns with the idea behind roll up banner design tips and the broader concept of designing roll up banners that communicate clearly even in quick glances.
Layout, Hierarchy, and Brand Cohesion on the Trade Show Floor
A well-structured layout guides the viewer’s eye from a bold headline to supporting details and finally to a clear call to action. Establish a visual hierarchy that places the most important message at the top, using a strong visual anchor to draw attention. This is where roll up banner design tips come into play, helping you balance typography, imagery, and white space for maximum readability.
Maintain branding consistency across your booth by aligning colors, fonts, and imagery with your broader marketing toolkit. Choose a color palette that stands out under convention-center lighting while remaining faithful to your brand. Consistency reinforces recognition across channels and makes your presence feel cohesive rather than disparate.
Materials, Finishes, and Printing Realities for Trade Show Banners
Material choice affects durability, weight, glare, and overall perceived quality. A premium matte or satin finish reduces reflections in bright hall lighting, while a glossy finish can make imagery pop if aligned with your visuals. Regardless of finish, ensure safe margins and bleed so important text stays intact after trimming.
The printing phase is as critical as the design. Work with a printer experienced in banner production, request color proofs, and verify that files meet typical print specs (such as 300 dpi at final size and CMYK color profiles). Understanding banner printing for trade shows helps you anticipate color accuracy and edge-to-edge alignment in real-world settings.
From Concept to Print: A Practical Step-by-Step for Custom Roll Up Banners
A successful banner starts with a clear concept that aligns with your show goals. Define your audience, the action you want them to take, and the problem you solve. These answers inform the banner’s content and visuals, tying back to your core message.
Follow a simple design sequence: draft the core message, select a focal image, choose purposeful typography, design a clean grid, and set strong color contrast. Then prepare print-ready artwork with correct bleed, deliverables in the right format, and perform a test read on a scaled mockup to ensure readability and color accuracy in real-world lighting.
Practical Considerations for a Custom Roll Up Banner for Trade Shows
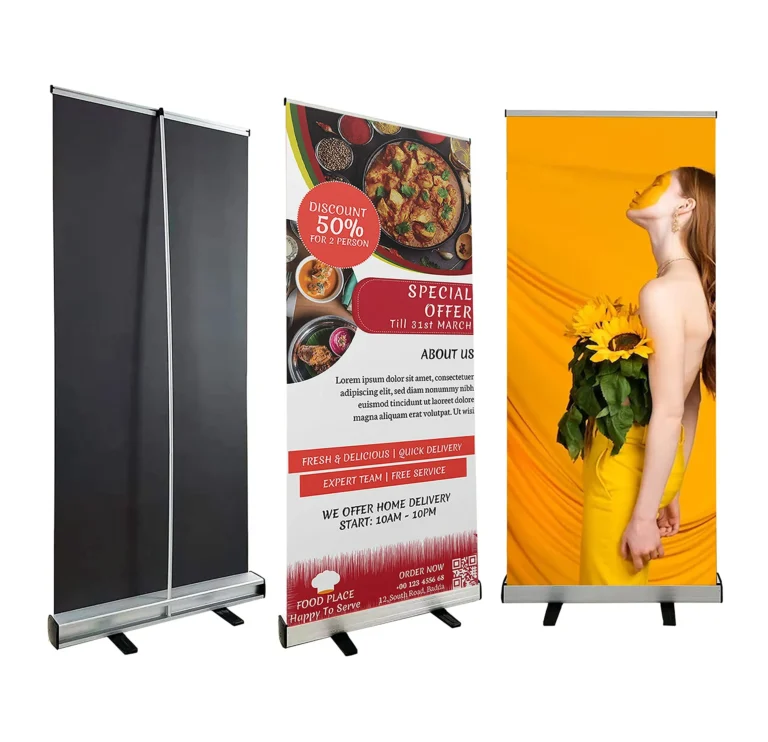
Size and orientation matter: the most common roll up banner size is around 850 mm by 2000 mm, but you may need variations to fit your booth. Plan the layout with vertical reading in mind as attendees skim along aisles, and consider how the banner integrates with your stand, lighting, and neighboring booths.
Collaborate with a printer early and verify compatibility with your booth layout, storage plan, and any special finishes. Request a print-ready file early and, if possible, obtain a placeholder frame to test the design in a live environment. This is where practical banner printing for trade shows and careful production management pay off, reducing the risk of surprises at the show.
Maximizing Impact: Integrating Your Roll Up Banner with Booth Strategy
A banner should be part of a broader booth narrative, not a standalone piece. Pair it with a well-trained staff briefing, a clear demonstration plan, and a compelling offer that invites dialogue. When your banner communicates the essentials, your team can focus on meaningful conversations rather than answering basic questions.
Extend the banner’s impact with complementary collateral such as one-pagers, case studies, or digital lead capture. This multi-channel approach ensures attendees can continue the conversation after the show, turning initial interest into qualified leads. Informed by trade show banner ideas and practical design principles, this strategy helps your display work harder and deliver a stronger return on investment.
Frequently Asked Questions
Why is a custom roll up banner for trade shows valuable, and what are essential roll up banner design tips to maximize impact?
A custom roll up banner for trade shows acts as a portable storytelling device, delivering your core message within seconds. Key roll up banner design tips include ensuring readability from distance, strong hierarchy, high-contrast colors, and a clear call-to-action. For print readiness, use 300 dpi at final size, CMYK color mode, and include bleed to prevent trim issues.
What are effective trade show banner ideas for a custom roll up banner for trade shows?
Great ideas include a bold headline at the top, a supporting focal image, minimal body text, and a visible URL or QR code to capture leads. Align visuals with your brand colors and use a simple grid to keep content scannable, finishing with a clear call-to-action.
How should I approach designing roll up banners to keep branding consistent across events?
Designing roll up banners starts with your brand language—palette, typography, imagery, and messaging. Use a clean grid, limit the number of typefaces, and ensure high-contrast text for quick readability. Review materials against your broader branding to maintain consistency.
What printing considerations should I know for banner printing for trade shows when producing a custom roll up banner?
Choose CMYK workflow, print at 300 dpi final size, and include bleed and safe margins to avoid cut-off text. Consider the finish—matte or satin to reduce glare, or gloss if imagery needs pop—and request a color proof from your printer to verify accuracy.
What common pitfalls should I avoid in roll up banner design for trade shows, and how can I prevent them?
Common pitfalls include overcrowding, tiny type, inconsistent branding, and low-resolution images. Prevent them by prioritizing white space, testing legibility from distance, sticking to 1–2 fonts, and using print-ready files with the correct formats.
How can a well-designed custom roll up banner for trade shows boost engagement from concept to booth display?
Start with a clear core message and focal image, then apply a simple grid, strong color contrast, and a visible call-to-action. Pair the banner with prepared staff training and complementary collateral to drive conversations and capture leads.
| Aspect | Key Points (Summary) |
|---|---|
| Why it matters | A compact storytelling device signaling professionalism; first contact before conversations; draws attention and invites learning. |
| Clarity and readability from a distance | Conveys core message in 5–7 seconds with bold type, high contrast, and a concise value proposition; avoid cramped text. |
| Hierarchy and layout | Headline at top, then supporting details, then CTA; strong visual anchor; balance typography with imagery and white space. |
| Color and branding consistency | Brand-aligned palette; ensure visibility under convention lighting; bold brand colors to frame focal point; use secondary colors for body text; maintain cross-channel consistency. |
| Imagery and typography | Use high-resolution imagery; typography readable from distance; test font sizes at different viewing distances to ensure legibility. |
| Printing and materials | Material affects durability, weight, and finish; matte/satin reduces glare, gloss can make images pop; ensure safe margins (bleed) to prevent cutoffs. |
| Designing Your Banner: Concept to Print | Start with a clear concept aligned with goals; define audience, action, and problem solved; these guide content and visuals. |
| Step-by-Step: Creating a Custom Roll Up Banner for Trade Shows | Define core message (8–12 words); select focal image; choose typography (one primary, one supporting); design a clean grid; set color/contrast; add clear CTA; prepare print-ready artwork (PDF/TIFF, 300 dpi, CMYK, bleed); review and test. |
| Practical considerations: Materials, Size, and Production | Common size 850 mm x 2000 mm; vertical orientation; consider hall lighting, booth neighbors, and traffic flow; verify compatibility with booth layout and finish options. |
| Common Pitfalls | Overcrowding; tiny type; inconsistent branding; production surprises (low-res images, wrong file formats); ensure print-ready files and printer specs early. |
| From Concept to Booth | Banner is a living storytelling component; pair with staff briefing, a demonstration plan, and offers; use complementary collateral to extend conversation; leverage a multi-channel approach for ROI. |
Summary
Conclusion: A well-crafted custom roll up banner for trade shows is both an art and a science. By prioritizing clarity, hierarchy, branding consistency, and print-ready execution, you can produce a banner that captures attention, communicates your core message, and drives engagement. Applying practical design tips, trade show banner ideas, and a disciplined approach to roll up banners helps you start conversations, showcase your value, and move prospects toward meaningful follow-up after the event.