
A well-fitting Custom shirts sizing and fit can transform how you look and feel in your everyday wardrobe. This guide explores how to measure for custom shirts so you can order with confidence and minimize later alterations. Understanding shirt measurements for custom tailoring helps you choose the right fabric, collar, and sleeve options. By learning measuring for tailored shirts and using a clear custom shirt sizing chart, you gain consistent results. Follow best practices for shirt measurements to ensure comfort, mobility, and a clean drape across styles.
A second framing uses alternative terms such as personalized shirt sizing, garment fit, and measured tailoring to convey the same idea. Think of the process as translating your body measurements into a pattern, where proportions, ease, and silhouette are aligned with your daily activities. This approach centers on neck, chest, waist, sleeve length, and hip data and connects them to a reliable sizing system. In practice, made-to-measure garments employ fit grades and ease guidelines to anticipate fabric behavior and ensure the shirt moves with you. This LSI-inspired framing helps readers connect to related concepts such as measurement methods, fit guides, and sizing charts.
Custom shirts sizing and fit: Foundations for a precise wardrobe
A well-executed fit begins with solid foundations. Custom shirts sizing and fit influence comfort, drape, and the overall impression your wardrobe conveys, so understanding how measurements translate into a flattering silhouette is essential. This section introduces the core concepts, including how to measure for custom shirts and the role of ease in achieving your desired look. By framing fit from the outset, you set a solid baseline for choosing patterns, fabrics, and a tailoring approach that aligns with your lifestyle.
From the start, consider the balance between comfort and silhouette. Knowing your body’s proportions helps you communicate what you want—whether a relaxed, breathable feel or a sharp, tailored line. As you work through the guide, you’ll encounter terms like shirt measurements for custom tailoring and best practices for shirt measurements, which reflect how precise data translates into a garment that looks and moves right on you.
How to Measure for Custom Shirts at Home: Step-by-step Guidance
Measuring at home is the first practical step toward wearable precision. This section covers the hands-on process of how to measure for custom shirts, emphasizing accuracy over speed. You’ll learn to prepare your tools, create a calm measuring environment, and approach each metric with purpose so the final shirt matches your expectations.
To capture reliable data, wear neutral underlayers and use a mirror or a helping hand when needed. Measuring for tailored shirts becomes straightforward when you follow a consistent method for neck, shoulders, chest, waist, and sleeve length. The goal is to translate body measurements into a sizing strategy you can trust, crossing over into discussions of a custom shirt sizing chart for longer-term ordering.
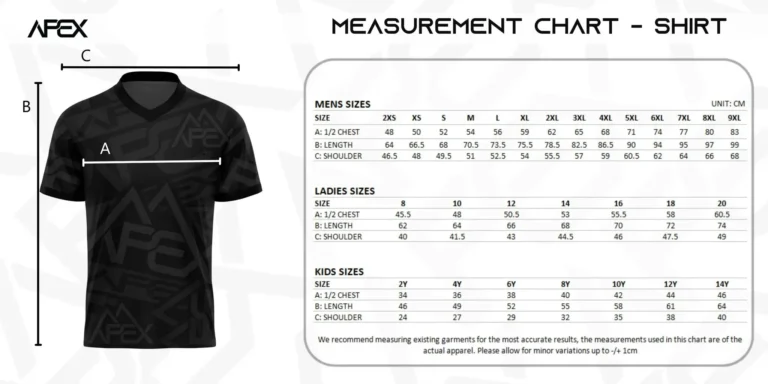
Interpreting Measurements with a Custom Shirt Sizing Chart
A custom shirt sizing chart is your map from numbers to a wearable product. This section explains how to interpret measurements by aligning chest, waist, and hip with neck and sleeve data to define a fit category—slim, standard, or relaxed. Using a sizing chart helps you start with a reliable baseline and communicate more clearly with your tailor or shirt maker.
Beyond raw numbers, consider fabric behavior and ease preferences. Your chart can note whether you favor a looser or closer chest, how much room you want at the waist, and the expected drape of the fabric. Incorporating terms like measuring for tailored shirts and shirt measurements for custom tailoring keeps the discussion practical and focused on achievable outcomes.
Measuring for Tailored Shirts: Key Areas and Technique
Tailored shirts hinge on precise measurements across several critical areas. This section covers neck circumference, shoulder width, chest, waist, and sleeve length, as well as armhole depth and balance between the neck and chest. Mastery of these metrics helps ensure the final shirt sits correctly on your frame and moves with you throughout the day.
Pay attention to how you measure each region and how your posture affects the result. Accurate neck and sleeve data prevent tight collars or restricted movement, while correct chest and waist measurements determine the shirt’s ease and silhouette. This is where the ideas of measuring for tailored shirts and shirt measurements for custom tailoring become practical, guiding your selections for a precise, comfortable outcome.
Best Practices for Shirt Measurements: Avoid Common Pitfalls
Even careful measurements can go astray if you miss key steps. This section outlines best practices for shirt measurements, from how to position the tape to how to record each metric. Learn to measure with the body as the reference point, not a copied garment, to avoid shape distortion and inaccurate results.
Common pitfalls include measuring over bulky clothing, pulling the tape too tight, or neglecting posture and symmetry. Rechecking measurements after a few days and documenting the process helps catch errors early. By adopting these best practices for shirt measurements, you’ll improve consistency across orders and future fittings.
From Measurement to Mastery: Communicating with Your Tailor for Perfect Fit
Turning numbers into a flawless shirt requires clear communication with your tailor. This section emphasizes sharing a full set of measurements, preferred ease, and intended wear context to help the tailor translate data into the right cut. Including notes on collar type, cuff style, and hem length can streamline the process and reduce the need for late alterations.
A well-documented sizing approach—anchored by a robust custom shirt sizing chart and explicit instructions about sleeve length and shoulder slope—helps tailor discussions stay productive. When you refer to terms like shirt measurements for custom tailoring and the overall concept of Custom shirts sizing and fit, you reinforce a shared understanding that speeds up fittings and improves the final result.
Frequently Asked Questions
How to measure for custom shirts to ensure a perfect fit?
To measure for custom shirts accurately, use bare skin or a light layer and a flexible tape. Record key dimensions—neck, shoulder width, chest, waist, sleeve length, and shirt length—and note how you prefer ease in each area. Recheck measurements with a friend or in front of a mirror, then translate them into your custom shirt sizing chart to guide a precise fit.
What are the best practices for shirt measurements when building a custom shirt sizing chart?
Follow best practices for shirt measurements by maintaining good posture, avoiding bulky clothing, and capturing measurements on both sides where relevant. Keep the tape horizontal and snug enough to stay in place but not compressive, document each figure, and verify consistency after a few days. Use these careful readings to populate your custom shirt sizing chart for reliable tailoring.
How does measuring for tailored shirts influence your sizing strategy and fit category?
Measuring for tailored shirts drives the choice between slim, regular, or relaxed fits by balancing shoulder, chest, and waist ease. Accurate neck, sleeve, and armhole data ensure the final silhouette drapes correctly and aligns with your desired look. Use these measurements to select a fit category on your sizing chart and communicate precise ease to your tailor.
How can I use a custom shirt sizing chart to choose the right fit for a tailored shirt?
A well-maintained custom shirt sizing chart helps map chest and waist measurements to a fit category, while neck and sleeve length confirm proportion. Compare your results against the chart to pick a standard size or specify bespoke adjustments, then adjust ease according to your preferred style and the fabric’s behavior.
What are common mistakes in shirt measurements for custom tailoring and how can I avoid them?
Common mistakes include measuring over bulky clothing, pulling the tape too tight or too loose, and neglecting posture or fabric behavior. Don’t skip measuring both sides or re-checking after a few days. Avoid these by measuring on bare skin, with a flexible tape, and documenting your method for clear communication with your tailor.
Why is neck-to-chest balance important when measuring for tailored shirts, and how does it influence collar style?
Neck-to-chest balance matters because a chest that’s larger than the neck can shift collar fit and overall proportion. If your chest is fuller, increase neck ease or choose a collar style that maintains a balanced look. This neck-to-chest check is a key consideration in measuring for tailored shirts.
| Section | Key Points | Practical Takeaways |
|---|---|---|
| Introduction | A well-fitting shirt transforms how you look and feel; sizing and fit are foundational. The guide centers on Custom shirts sizing and fit, with at-home measurement steps to order with confidence and reduce alterations, applicable to both bespoke tailoring and improved off-the-rack results. Precise measurements enable a shirt that drapes well, moves with you, and presents a sharp look. | Start with precise measurements to guide your shirt size, style, and tailoring decisions. |
| Tools and Preparation | Gather simple tools before measuring: a flexible tape measure, a mirror, a notepad, lightweight clothing or typical shirt undergarment, and optionally a helping hand. | Create a calm measuring environment and document measurements along with any ease preferences. |
| Step 1: Neck circumference | Measure around the base of the neck where a collared shirt sits; tape should be snug but not tight; note preferred collar ease. | Record neck measurement and collar ease preference. |
| Step 2: Shoulder width (across back) | Measure from one shoulderbone edge to the opposite shoulder; this determines alignment with the shoulder line and influences drape. | Use to ensure shoulder line aligns with your body’s shape. |
| Step 3: Chest or bust circumference | Wrap tape around the fullest part of the chest, under the armpits; keep tape parallel to the floor; note desired chest ease. | Critical for setting chest fit in Custom shirts sizing and fit. |
| Step 4: Waist circumference | Measure at the natural waistline; adjust ease for tucked-in silhouette or a more relaxed midsection. | Translate to waist ease in the sizing chart. |
| Step 5: Hip/seat circumference (for longer shirts) | If you plan longer shirts or those designed to be tucked in at the back, measure the widest point across the hips. | Helps prevent riding up and ensures comfortable movement. |
| Step 6: Sleeve length and bicep circumference | Sleeve length: measure from center back of neck to wrist with the arm slightly bent; Bicep: measure around the fullest part of the upper arm. | Informs sleeve cut and balance with the torso for the desired silhouette. |
| Step 7: Armhole depth and shoulder crease | Armhole depth affects movement; shoulder crease helps ensure a natural sleeve cap fall. | Improves comfort and sleeve hang. |
| Step 8: Shirt length | Measure from the high point of your shoulder to the desired hem length; style varies from standard dress to casual shirts. | Choose length to suit style and wear preference. |
| Step 9: Neck-to-chest balance (optional) | Compare neck circumference to chest; if the chest is larger than the neck, consider a roomier neck area or a different collar style to maintain proportion. | Helps maintain proportional look; adjust collar style as needed. |
| Translating Measurements into a Sizing Strategy | Use chest with waist and hip, then cross-reference neck and sleeve data to define a fit category (slim, standard, or relaxed). Start with a starting size or work with a tailor for a true bespoke shirt. | Use a sizing chart to guide decisions and communicate with the tailor. |
| Common Mistakes and How to Avoid Them | Measuring over bulky clothing; tape too tight or too loose; poor posture; ignoring fabric behavior; not measuring both sides. | Measure on bare skin, be mindful of posture, note fabric behavior, and measure both sides when possible. |
| Understanding Fit Styles and How Measurements Drive Style | The cut—slim, regular, or tailored—significantly affects how measurements translate into the final garment; slim reduces ease, while regular and tailored preserve more room. | Choose fit style based on body type, activity, and desired silhouette. |
| Practical Tips for Achieving Optimal Results | Re-measure after a few days; use a mirror or helper; document methods; communicate explicit ease; consider pattern differences. | Improve accuracy and tailor-ready documentation for future orders. |
| Tailor Communication and Final Adjustments | Share the full measurement set (chest, waist, hip, neck, shoulder width, sleeve length, shirt length); state desired fit and ease; discuss starting ease or plan a first fitting. | Provide clear instructions to your tailor and prepare for fittings. |
| Real-World Application: Building Confidence with a Sizing Chart | Maintain a sizing chart that lets you compare measurements to a standard scale; note fabric stretch, collar/cuff styles, and hem length for confident ordering. | Keep the chart as a living document for current and future shirt orders. |
Summary
Custom shirts sizing and fit shape how you present yourself in every setting by turning precise measurements into a tailored, comfortable garment. This descriptive overview emphasizes how careful at-home measuring, a reliable sizing chart, and clear communication with a tailor reduce alterations while maximizing movement and drape. By documenting neck, shoulder, chest, waist, hip, and sleeve data—and by understanding how ease influences the final silhouette—you can select standard options or guide bespoke production to match your fabric choices and lifestyle. The journey from measurement to a finished shirt that feels made for you becomes a confident, repeatable process, helping you build a wardrobe of shirts that look sharp and move with you.