
Digitizing vs Embroidering is a pivotal decision for anyone turning artwork into wearable art, because it determines how smoothly a design moves from concept to stitch, from digital file to finished fabric. If you’re optimizing the workflow, you’ll weigh digital embroidery design strategies against traditional fabric embellishment to balance speed, durability, and visual quality. Digitizing is the preparatory phase that encodes stitch types, densities, and underlay, while embroidering is the actual execution on fabric, a distinction that shapes edge sharpness and fabric stability. Deciding which path to take hinges on project scope, timelines, and budget, and on whether you need scalable production across many items or a single piece with artisanal nuance. If you’re looking for practical guidance, this overview introduces core ideas and points you toward reliable resources and practical steps.
From another angle, you can frame the topic as a pre-production planning journey, where stitching instructions evolve into a reliable blueprint for machine performance. Applying LSIs, you’ll encounter related terms such as embroidery digitizing and embroidering vs digitizing that help connect the dots between planning and execution. A practical takeaway is to map these ideas into your workflow and test stitch plans across fabrics. By weaving alternative terms into your content, you improve web discoverability while keeping the explanation clear for readers new to the topic.
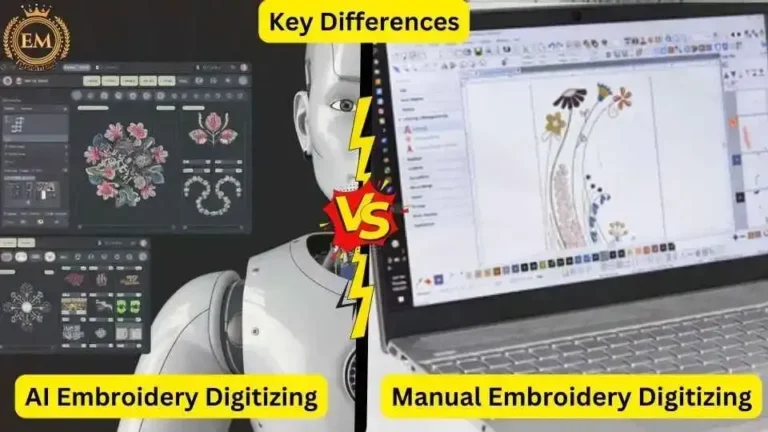
Digitizing vs Embroidering: Key Concepts for Modern Textile Production
Digitizing and embroidering are the two halves of turning artwork into wearable and decorative fabric. Digitizing is the preparatory step that translates a design into stitch data, guiding how an embroidery machine will sew the image onto fabric. In the realm of digital embroidery design, digitizing software for embroidery provides the tools to choose stitch types, plan color stops, and simulate sew paths before any thread touches material.
Embroidering, by contrast, is the execution phase—the actual stitching that brings the design to life. Whether done by hand or by machine, embroidery depends on chosen stitches, fabric stability, thread quality, and operator skill. When people compare embroidering vs digitizing, they’re really weighing pre-production planning against the sewing process, each shaping the final look, durability, and texture of the finished piece.
When to Digitize vs When to Embroider: A Practical Decision Framework
Deciding between digitizing and embroidering hinges on project goals, volume, and timeline. For scalable, repeatable results across many garments, digitizing your artwork into a stitch file enables rapid production and consistent outcomes. This is where digitizing software for embroidery shines, supporting complex fills, precise outlines, and reliable color management.
For quick-turnaround or highly artistic one-offs, traditional embroidering often wins. In such cases, the aesthetic may rely on hand-finished elements or bold, spontaneous stitching. If you’re learning how to digitize embroidery, you’ll still benefit from understanding the trade-offs, as some projects may blend direct embroidery techniques with selective digitizing to balance speed and style.
Digital Embroidery Design in Practice: Ensuring Consistency Across Products
Digital embroidery design emphasizes consistency, repeatability, and efficient scaling across product lines. By using digitizing software for embroidery to standardize stitch types, densities, and color stops, brands can reproduce the same look on apparel, home textiles, and accessories without reworking the artwork. This approach also supports tighter color control and streamlined production planning.
A well-executed digital embroidery workflow helps maintain uniform edge sharpness and texture, whether a small logo or a large fill area. When you pursue embroidery digitizing, you can adapt designs for different fabrics and garment types while preserving the core aesthetics, ensuring a cohesive brand feel from run to run.
Tools and Workflows: Selecting Digitizing Software for Embroidery
Choosing the right tools begins with evaluating digitizing software for embroidery features such as stitch libraries (satin, fill, running), underlay options, pull compensation, and color management. A solid package should also offer simulation and validation to preview how stitches sew on fabric before committing to production.
Workflows matter as much as software. Look for outputs in industry formats (DST, EXP, PES) and compatibility with your embroidery hardware. A practical workflow balances design flexibility with production efficiency, helping you move smoothly from artwork to stitch data and then to finished goods.
From Artwork to Stitch Data: A Practical Guide to How to Digitize Embroidery
How to digitize embroidery starts with clean, high-contrast artwork and a plan for color order. Digitizing involves tracing elements, assigning appropriate stitch types, and applying underlay and stabilizers where needed. The process is anchored by the goal of translating artwork into a machine-friendly instruction set that preserves detail and intention.
With a focused workflow, you create a punch list of color stops, place stitches strategically, and test-solve issues related to fabric type or thread. After digitizing, you export the design in the correct formats and document stabilizer recommendations to guide future production, ensuring a reliable path from design concept to sewn product.
Common Pitfalls in Embroidering vs Digitizing and How to Avoid Them
A frequent pitfall is over-dense fills on delicate fabrics, which can cause puckering or fabric damage. Relying solely on a single method for all designs also reduces flexibility. By comparing embroidering vs digitizing decisions, you can tailor a plan that minimizes risk and maximizes quality.
Other issues include neglecting underlay, which increases show-through and instability, and poor color management that leads to mismatched thread hues. To avoid these problems, validate designs with test sews on similar materials, maintain a library of stitch sequences, and continuously test fabrics and threads to understand how they interact with digitized files.
Frequently Asked Questions
What is Digitizing vs Embroidering, and why does it matter in digital embroidery design?
Digitizing vs Embroidering describes two stages of embroidery production. Digitizing is the prep step that turns artwork into stitch data—selecting stitch types, densities, underlay, and color stops—using embroidery digitizing software. Embroidering is the execution, where the machine stitches the data onto fabric. In digital embroidery design workflows, understanding the difference helps you balance quality, repeatability, and production speed.
When should you choose digitizing vs embroidering for a logo on branded apparel, and how does digital embroidery design influence that choice?
For logos on branded apparel, the choice between digitizing vs embroidering depends on scale, timeline, and quality needs. Digitizing provides repeatable, scalable results across large orders and multiple product lines by optimizing stitch types, densities, and color management. Embroidering is often faster for a single item or small runs but can vary in quality without a solid stitch plan. In a digital embroidery design workflow, leveraging embroidery digitizing software helps you plan and test the final look before stitching.
What role does digitizing software for embroidery play in the Digitizing vs Embroidering decision?
Digitizing software for embroidery is the foundation of the digitizing side of the workflow. It lets you create stitch data, choose stitch libraries, set underlay and pull compensation, manage colors, and export formats compatible with embroidery machines. Access to good digitizing software makes digitizing vs embroidering decisions more predictable and repeatable, especially for large runs.
How to digitize embroidery: what are the essential steps, and how does this affect the decision to digitize or embroider?
How to digitize embroidery involves: preparing clean artwork, selecting stitch types, adding underlay and pull compensation, tracing and placing stitches, validating with simulation, and exporting machine-ready formats. Following this workflow helps you decide to digitize when repeatability and fabric control matter, and to embroider when speed and artistry for a single item are prioritized.
What are the key pros and cons of Digitizing vs Embroidering across fabrics and production runs?
Digitizing offers consistency, scalability, and color control, making it ideal for large orders and multiple fabrics, but it requires upfront time and cost for setup. Embroidering can be quicker for small runs or unique pieces and can be more forgiving for simple designs, yet it may lack repeatability and precise control across production. The right choice depends on fabric type, run length, and end-use durability, within a digital embroidery design framework.
Which scenarios favor Digitizing vs Embroidering in large orders, and how do you weigh repeatability, cost, and turnaround?
For large orders or multi-product lines, Digitizing vs Embroidering typically favors digitizing because it enables repeatable results, scalable production, and easier color management. If turnaround time is critical or the design is simple and artistic, embroidering may be preferable. Always evaluate fabric compatibility, required durability, and available digitizing software for embroidery to decide the best path.
| Aspect | Key Points |
|---|---|
| What Digitizing Is | Converts artwork into stitch data; uses stitch types, densities, color stops; creates a digitized file for embroidery machines; enables repeatable production across items. |
| What Embroidering Is | The actual stitching on fabric, by hand or machine; execution quality depends on fabric, thread, stitch choices, and machine calibration. |
| When to Use Digitizing | For repeatable, scalable results across large orders or multiple product lines; complex fills or outlines; color management and future size adjustments. |
| When to Use Embroidering | For quick turnarounds, small runs, artistic/hand-finished pieces, or when digitizing resources are unavailable. |
| Quality & Precision | Digitizing plans stitches to minimize distortion and achieve crisp edges; embroidery quality also depends on execution and machine setup. |
| Time & Cost | Digitizing has upfront time/cost but enables rapid, scalable production; embroidery may be faster for small runs but less scalable over time. |
| Versatility & Scalability | Digitized designs scale across sizes/products with preserved stitch integrity; embroidered-only approaches risk density changes across sizes. |
| Fabric Compatibility & Durability | Digitizing tailors underlay, pull compensation, and stitch types to fabric; well-digitized files tend to be more durable across fabrics. |
| Tools, Software & Workflows | Stitch libraries, underlay options, color management, simulation/validation, and machine-format outputs (DST, EXP, PES) with hardware compatibility. |
| How to Digitize Embroidery (Guide) | Prepare artwork, choose stitch types, create a punch list of color stops, apply underlay and pull compensation, validate via simulation, test sew, and output ready-to-sew files. |
| Common Mistakes & Best Practices | Overly dense fills, skipping underlay, failing to validate on fabric, poor color management, reliance on a single method; balance approaches for flexibility. |
| Bottom Line | Digitizing vs Embroidering is a spectrum. The best choice depends on goals, budget, and timeline, often benefiting from a strategic blend. |
Summary
Digitizing vs Embroidering shapes how designers turn artwork into wearable art. In practice, your decision hinges on project goals, production volume, and budget, with digitizing offering repeatable, scalable results and embroidering delivering immediacy and artistic texture. By understanding when to digitize and when to embroider, you can optimize workflows, reduce waste, and achieve durable, high-quality embroidered designs. The right balance between Digitizing vs Embroidering enables you to tailor stitch types, fabric compatibility, and production processes to meet client needs and product specs, ensuring success across a range of fabrics and applications.