
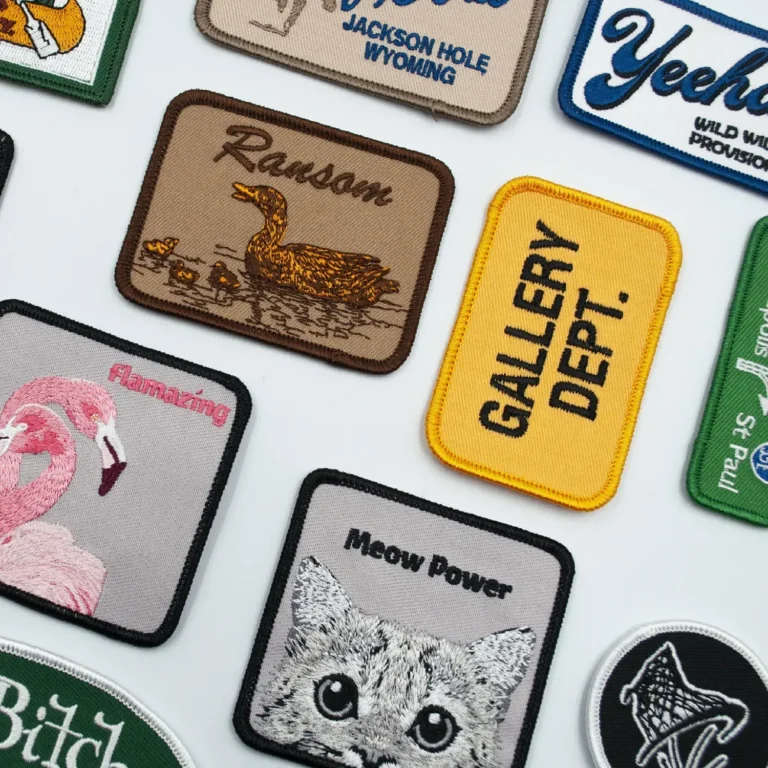
The idea of embroidered patches offers a vibrant, durable way to refresh clothing and accessories. DIY fashion has exploded in popularity, and embroidered patches let you express personality with minimal cost and maximum impact. If you’ve ever wondered how to transform plain fabric into a statement piece, you’re in the right place. This guide covers how to apply embroidered patches and includes iron-on patches, sew-on patches, a patch placement guide, and DIY clothing customization. By the end, you’ll have a reliable process for clean, durable results that stand up to daily wear.
Beyond the term embroidered patches, these fabric embellishments are described as decorative fabric patches, stitched badges, or fabric appliques that add personality with minimal fuss. From an SEO and LSI perspective, the concept blends color, texture, and storytelling through a mix of adhesive backings, heat-activated systems, and careful stitching. Understanding the difference between iron-on and sew-on methods remains essential for choosing durability and fabric compatibility. A thoughtful approach to placement, guided by a patch placement guide, helps you map layouts that feel intentional across garments.
1) Choosing and Positioning Embroidered Patches for DIY Clothing Customization
Selecting the right patches is the foundation of a successful DIY clothing customization project. Consider color contrast, patch size, and the garment’s fabric to ensure the design pops without overwhelming the piece. Bold, vibrant patches often work best on neutral backgrounds, while subtler patches can blend into busy prints. Aligning patches with your overall style story helps each piece tell a cohesive narrative.
Before attaching anything, plan the layout using a patch placement guide as your reference. Lay the patches on the garment without fixing them, evaluate balance from a distance, and adjust as needed. Tools like painter’s tape or fabric chalk can help mark precise positions, ensuring symmetry and intentional spacing that enhances the final look.
2) Iron-On Patches vs Sew-On Patches: Pros, Cons, and Best Practices for Everyday Wear
Iron-on patches are popular for quick projects and beginners due to their heat-activated adhesive, which simplifies the initial attachment process. They’re ideal for casual wear and items that won’t endure heavy washing. However, durability can vary with fabric type and washing conditions, making testing essential.
Sew-on patches offer exceptional durability because they’re anchored with stitching. They’re a preferred choice for jackets, bags, and other items subject to frequent washing or rough use. While they require more time and basic sewing skills, the long-term resilience makes sew-on patches a solid investment for enthusiasts of DIY clothing customization.
3) How to Apply Embroidered Patches: Step-by-Step for a Clean, Durable Finish
If you’re wondering how to apply embroidered patches, this step-by-step approach focuses on clean adhesion and lasting results. Start by choosing the appropriate method for your fabric and patch type, then prepare a scrap piece of fabric to test heat or stitching tension before touching the final garment.
Begin with a precise position, using low-tack tape to hold the patch in place. For iron-on patches, protect both patch and garment with parchment paper, then apply steady, even pressure as recommended by the patch instructions. For sew-on patches, baste the edges first and use a consistent stitch pattern to secure the patch without distorting the fabric.
4) Patch Placement Guide: Designing Balanced, Aesthetic Arrangements on Jackets, Bags, and More
A well-planned patch placement guide helps you avoid a cluttered look and ensures each patch contributes to a cohesive design. Consider symmetry on jackets and shirts, spacing between patches, and proximity to seams to protect the garment’s structure during wear. The right arrangement can transform a simple item into a bold, personalized statement.
When applying patches to different items like denim jackets, backpacks, or hoodies, adapt the scale and placement to the garment’s surface. Larger patches can anchor a design on the back of a jacket, while smaller patches work well on elbows, pockets, or sleeves. Always test-fit the layout before permanent attachment to maintain proportion and visual balance.
5) Durability and Care: Keeping Your Patches Looking Fresh Through Washing and Wear
Durability depends as much on how you care for patched garments as on how you apply the patches. Turn the garment inside out before washing to reduce abrasion on the patch edges, and choose a gentle cycle with cool or warm water. Harsh detergents can degrade adhesives and threads over time, so opt for milder formulations when possible.
Air-dry or lay flat to prevent heat damage, particularly for iron-on patches. If you must iron again later, avoid direct heat on the patch; place a protective cloth over it and use a low heat setting. Routine inspection and occasional touch-ups with a light stitch can extend the life of both iron-on and sew-on patches in a DIY clothing customization project.
6) Troubleshooting Common Patch Attachment Issues and Fixes
Even with careful prep, patches can misbehave. Edges may peel after washing, or patches can warp if exposed to uneven heat. For iron-on patches, consider re-pressing with a parchment barrier and ensuring you’re using the correct heat setting for the fabric. If stubborn edges persist, sewing around the border can provide extra security.
Other common issues include patches not adhering well on curved areas or stretch fabrics. In these cases, a combination approach—gentle heat with a supportive stitch along the edge—often yields the most durable finish. If a patch needs removal, use careful heat or a seam ripper, then reapply in a guided layout from your patch placement guide.
Frequently Asked Questions
What are embroidered patches and how do I apply embroidered patches?
Embroidered patches are decorative fabric pieces with stitched designs that you can attach to garments using iron-on or sew-on methods. For how to apply embroidered patches, choose patches and plan placement with a patch placement guide, then follow the adhesive or stitching steps outlined by the patch.
What’s the difference between iron-on patches and sew-on patches for DIY clothing customization?
Iron-on patches use a heat-activated adhesive, while sew-on patches rely on stitching. For DIY clothing customization, choose based on fabric, desired durability, and how you want to attach them—quick iron-on application or longer-lasting sew-on security.
How do I plan patch placement using a patch placement guide?
Use a patch placement guide to lay out patches before attaching. Position patches symmetrically, test fit on the garment, and mark placement with chalk or tape so the final look is balanced and intentional.
How should I care for garments after applying embroidered patches?
Care for patched garments by turning them inside out, washing on a gentle cycle with cool water, and avoiding harsh detergents. Air dry to preserve adhesion for iron-on patches and ensure sturdy stitching for sew-on patches.
How do I remove and replace embroidered patches if I want to switch designs?
To remove patches, gently heat or use a seam ripper to release iron-on adhesive, or carefully unpick sew-on stitches. Reposition with a new patch using a patch placement guide and reattach via the preferred iron-on or sew-on method.
What tools and tips help ensure a professional finish when applying embroidered patches?
Essential tools include embroidered patches, an iron (with parchment paper), pins, scissors, and sewing supplies (needle and thread or a sewing machine). Always test on scrap fabric, follow the patch’s instructions, and use a patch placement guide to achieve a clean, durable finish.
| Aspect | Key Points |
|---|---|
| What are embroidered patches? | Two main attachment methods: iron-on (heat-activated adhesive) and sew-on (stitched). Iron-ons are fast and convenient; sew-ons offer greater durability. Patches add color, texture, and storytelling to clothing. |
| Patch types and terminology | Iron-on patches use heat-activated adhesive; sew-on patches are secured with thread. Iron-ons are quick for casual projects; sew-ons are best for items that will be washed frequently or endure heavy use. |
| Tools, materials, and prep | Patches, garment, iron and ironing surface, parchment paper or thin cloth, pins or fabric chalk, scissors, sewing supplies, seam ripper, test fabric scraps. Always test heat on scrap fabric before final application. |
| Choosing patches and planning placement | Consider garment color, texture, and patterns. Bold patches work on neutral fabrics; subtle patches on busy designs. Plan layout before attaching; test with painter’s tape or fabric chalk for balance and alignment. |
| Applying iron-on patches | Preheat and test on scrap; position the patch; cover with parchment or cloth; press firmly without sliding; hold 15–30s; cool and check edges; reapply heat if needed. For extra durability, sew a light zigzag edge. |
| Applying sew-on patches | Position and pin; baste to hold; choose a stitch (running or blanket; zigzag for machine); sew with small, even stitches; knot and trim; ensure edges are secure. |
| The patch placement guide | Aim for symmetry, avoid crowding seams, leave 1–1.5 inches between patches for balance; adapt size to garment type (denim allows larger or more patches; tees benefit from smaller patches near chest or cuffs). |
| Caring for patched garments | Turn inside out before washing; gentle cycle with cool/warm water; avoid harsh detergents; hang dry or lay flat; iron with protective cloth on patch if needed. |
| Troubleshooting common issues | Edges peeling, wrinkling, or misalignment: reheat/press; use protective cloth; for curved areas, press in smaller sections or resew edges if needed. |
| Special fabrics and situations | Leather, vinyl, or heavy knits may require sew-on or specialized adhesives; on stretch fabrics, avoid high heat; consider zigzag or hand-stitch. |
| Removal and replacement | To remove: heat or seam ripper for iron-ons; for sew-ons, remove threads and clean glue. Plan replacements with a clear patch placement guide. |
| Putting it all together | Apply patches with a consistent process: plan placement, choose patch types, and follow proper techniques for iron-on or sew-on patches; care post-patching to maintain results. |
Summary
Embroidered patches offer a simple, impactful way to refresh your wardrobe and tell your story. Whether you choose iron-on patches for quick results or sew-on patches for long-lasting durability, the key to a professional finish lies in careful preparation, precise placement, and a steady application technique. By applying the patch placement guide and care routines outlined, you can enjoy vibrant embroidered patches on jackets, backpacks, and other garments for years to come.