
DIY Custom Patches open up a world where jackets, backpacks, jeans, and hats become wearable canvases. In an era of personal style, patches carry memories, statements, and a dash of personality that can be refreshed with a new motif for modern wardrobes and timeless keepsakes daily. This beginner-friendly guide shows how to make patches at home using common materials and a few simple steps. You’ll learn design basics, from choosing fabrics to selecting the right adhesive and heat technique to endure washes. If you want a quick win, follow this custom patch tutorial to start with a bold, simple design.
Beyond the DIY label, these decorative fabric embellishments—appliques, fabric badges, or embroidered patches—offer a quick way to personalize gear. Think of them as small, expressive accents that can be applied with heat, stitching, or both, turning plain garments into conversation starters. Choosing the right backing, such as fusible web or sew-on options, and selecting fabrics that balance durability with comfort helps tailor wear and wash performance. Whether you call them appliqués, badges, or fabric patches, the idea remains the same: creative customization you can complete at home with basic tools.
DIY Custom Patches: A Beginner’s Guide to Iron-On Patches at Home
Patches talk back with personality, memories, and statements. For newcomers, DIY Custom Patches offer a friendly entry into personalized fashion, letting you transform jackets, bags, jeans, and hats without expensive tools. Using common fabrics and simple heat-activated adhesives, you can explore iron-on techniques at home and see your ideas come to life. This approach aligns with the idea of iron-on patches at home, making creativity accessible to hobbyists and creators alike.
This beginner-friendly guide walks you through planning, material selection, and heat-activation basics so your patches endure frequent washing. By starting with bold, simple shapes and clear designs, you’ll learn the core steps without getting overwhelmed. As you practice, you’ll discover that learning how to make patches at home is as much about experimentation and patience as it is about technique, and your first results will lay the groundwork for more ambitious projects.
Fabric Patch Materials: Choosing the Right Base for Durable Patches
The fabric you choose shapes the look, feel, and longevity of your patches. Denim and heavy twill offer durable bases that hold embroidery and edges well, while felt-backed fabrics can simplify edge control and reduce fraying. Leather and suede introduce a premium texture but may require different adhesives or backing to ensure a strong hold. Understanding fabric patch materials helps you tailor your patch to its garment and intended wear.
Consider how the patch will be used and washed. For activewear or backpacks, a sturdier base combined with a reliable fusible backing minimizes shifting during heat application. Lighter fabrics benefit from stabilizers or a backing that prevents puckering. Matching the patch material to the garment and the chosen adhesive is key to a clean, durable result when you’re assembling patches at home.
Patch Design Ideas: Creative Concepts that Work for Iron-On Patches
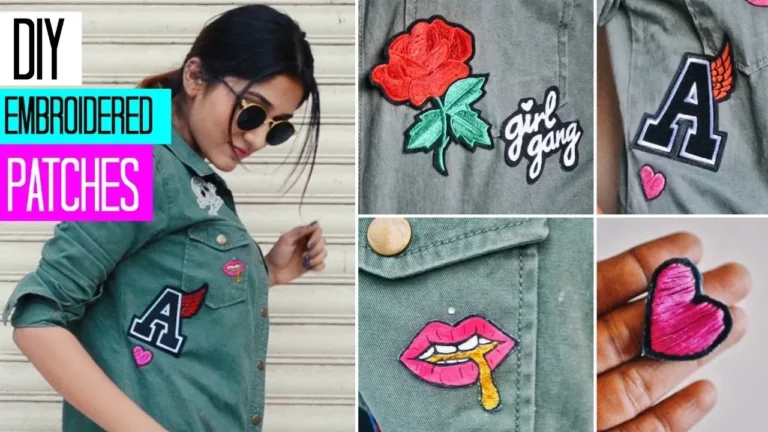
Design ideas set the tone for your patch collection. Monograms and initials offer bold, readable statements on denim jackets or bags, while simple symbols like hearts or stars translate well with minimal detail. Nature motifs, arrows, and travel icons also read clearly at a distance, making them practical for everyday wear. Exploring patch design ideas helps you build a repertoire of shapes and motifs that stay legible after heat-set and washing.
To elevate designs, consider texture and layering: combine felt with embroidery floss, or add a tiny bead accent for subtle depth. Mixed media patches—using fabric, transfer sheets, and thread—create a collage-like effect that stands out. When planning designs, think about color contrast, border definition, and the potential for multi-layer embroidery, which you can explore in a focused patch craft session or a longer custom patch tutorial.
Custom Patch Tutorial: A Step-by-Step Approach to How to Make Patches at Home
This section lays out a practical, end-to-end approach to making patches at home. Start with a concept sketch, then select your patch material and cut to shape. Digitizing the design or preparing a simple drawing helps refine lines and colors before you apply heat-activated backing. For those seeking a guided path, this is where a custom patch tutorial comes into play, turning your idea into a tangible patch.
Next, apply fusible backing or an iron-on adhesive sheet between the patch and the base fabric, then follow heat-press instructions carefully. Preheat the iron to the recommended temperature, protect the patch with parchment paper, and press evenly. After cooling, test adhesion and, if needed, reinforce with a short stitch around the edge. This step-by-step approach makes the process approachable for beginners while delivering durable, professional-looking results.
Apply and Care: Secure, Wash, and Preserve Your Patches
Once a patch is firmly attached, turning the garment inside out and applying additional heat helps secure the bond. Use a steady, non-sliding motion and allow the patch to cool completely before testing a corner lift. This careful application process minimizes shifts during laundering and reduces the chance of peeling.
Care and washing are crucial for longevity. Wait at least 24 hours before washing, then use a gentle cycle with cold water and air dry when possible. If your design includes embroidery or multiple fabric layers, extra stitching along the border can add resilience. Following these care steps preserves the patch’s appearance and function, ensuring your handmade patches continue to look intentional after repeated wear and washing.
Advanced Techniques and Troubleshooting for Long-Lasting Patches
As you gain confidence, explore advanced techniques like layered patches, embroidered edge finishes, and waterproof backing for outdoor gear. Layering allows a base shape to support smaller appliqués, a popular approach on denim jackets and backpacks. Embroidered edges add a refined look and help protect the patch’s outer edge from curling or fraying, while offering extra durability during washing.
Troubleshooting helps you recover from common issues. Edge fraying can be mitigated with a tight zigzag stitch or a seam-binding trick before applying heat, and uneven adhesion often results from surface dust or improper pressure—clean, dry, and flat surfaces yield the best results. Bleeding colors are avoided by using colorfast fabrics and stabilizers on light fabrics, and peeling after washing can be reduced by longer heat application or decorative edge stitching. With practice, you’ll convert these challenges into reliable, long-lasting patches and potentially develop your own signature patch process.
Frequently Asked Questions
What is DIY Custom Patches and how can I start with iron-on patches at home?
DIY Custom Patches let you transform jackets, backpacks, jeans, and hats into personalized pieces. To start with iron-on patches at home, gather a few basics (iron, ironing board or heat-safe surface, parchment paper, scissors, fabric, and fusible web), design a simple patch, cut it out, apply the fusible backing, and press with a hot iron according to the product instructions. Let the patch cool and test adhesion; finish with a touch of hand stitching if desired for extra durability.
What fabric patch materials work best for DIY Custom Patches and why?
Choosing the right fabric patch materials is key for durability and appearance. Denim and twill are sturdy options that hold patches well, while felt offers a clean edge and easy sewing. Pair these with a fusible web or heat-activated adhesive to bond patches securely, and consider embroidery thread for added detail.
Can you share a simple custom patch tutorial that covers patch design ideas and the basics of applying patches?
Yes—this custom patch tutorial walks you through sketching a concept, choosing materials, applying fusible backing or iron-on sheets, heating to bond, and finishing with edge stitching. For patch design ideas, start with bold monograms, simple symbols, or layered textures to learn the technique before tackling more complex designs.
How to make patches at home: what are the essential steps from design to heat-setting?
From concept to heat-setting, the core steps are: design your patch, cut the fabric, apply fusible backing or iron-on adhesive, heat-set with an iron, optionally stitch the edges, and finally test adhesion after cooling. Following these steps helps you learn how to make patches at home and create durable DIY Custom Patches.
What patch design ideas work well for DIY Custom Patches across different fabrics?
Great patch design ideas include monograms and initials for clean, readable accents on denim, symbols like hearts or stars for quick pops of color, and small icons tied to hobbies. Layered or mixed-media patches can add texture on fabric patch materials, and seasonal motifs keep designs fresh.
What common mistakes should I avoid and how can I troubleshoot issues with DIY Custom Patches?
Common mistakes include incomplete adhesion, fraying edges, and peeling after washing. To troubleshoot, ensure fabrics are clean and dry, use steady heat and pressure without sliding, and seal edges with a zigzag or satin stitch for durability. If peeling persists, reapply heat or reinforce with stitching.
| Topic | Key Points |
|---|---|
| Patches’ purpose and significance | Patches are more than decoration; they carry memories, statements, and personality. In personalized fashion, DIY Custom Patches let you transform jackets, backpacks, jeans, and hats into something truly unique. They can patch worn areas or display bold symbols, and learning how to create iron-on patches at home opens creative doors. |
| What you’ll learn | Design patches for different fabrics; choose between iron-on and sewn options; manage the process from concept to finished piece; explore design ideas from simple initials to intricate illustrations; troubleshoot adhesion issues if a patch won’t adhere. |
| Tools and Materials | Iron and ironing board, parchment paper or clean cotton cloth, scissors and a sharp rotary cutter, fabric for the patch (denim, cotton twill, felt, or leather), fusible web or heat-activated adhesive, optional embroidery thread and needle, optional printable fabric sheets or transfer paper. |
| Step-by-step overview | Step 1: Design and prepare your patch. Step 2: Cut patch material to shape. Step 3: Apply fusible backing or iron-on adhesive with heat. Step 4: Finish edges with sewing if desired. Step 5: Adhere to the final garment with heat and pressure. Step 6: Care and washing guidance to maximize longevity. |
| Design ideas | Monograms and initials; Symbols and icons; Pop culture or hobbies; Patches with texture (felt, embroidery); Mixed media (fabric, paper, thread); Seasonal designs. |
| Common mistakes and troubleshooting | Patch edge fraying; Uneven adhesion; Bleeding colors; Patch peeling after washing. Fixes include zigzag or satin stitches around edges, ensuring fabric is clean and dry, steady pressure without sliding the iron, and using colorfast fabrics. |
| Careful planning and practice | Practice on scrap fabric, master each step, and gradually tackle more complex designs. Clear design ideas and the right tools help you produce patches that look professional and wear well. |
| Advanced tips and variations | Print-to-patch with transfer fabric for detailed images; Embroidered edges with satin stitching; Layered patches for a dimensional look; Waterproof or kid-friendly patches with appropriate backing. |
| Patch ideas for various projects | Denim jackets: bold emblems or initials; Backpacks and hats: small icons; Jeans/skirts: rows of shapes; Shoes/sneakers: lightweight fabric patches. |
Summary
Introduction: DIY Custom Patches turn ordinary garments into personalized statements. They blend memories, style, and practicality, enabling you to transform jackets, bags, jeans, and hats into unique pieces. This guide covers design, materials, step-by-step techniques, design ideas, troubleshooting, care, and advanced tips to help you create durable patches that stand up to washing.